
Creative Colours Nail Polish / Varnish Review

So I was bought this awesome Christmas present by my little sister

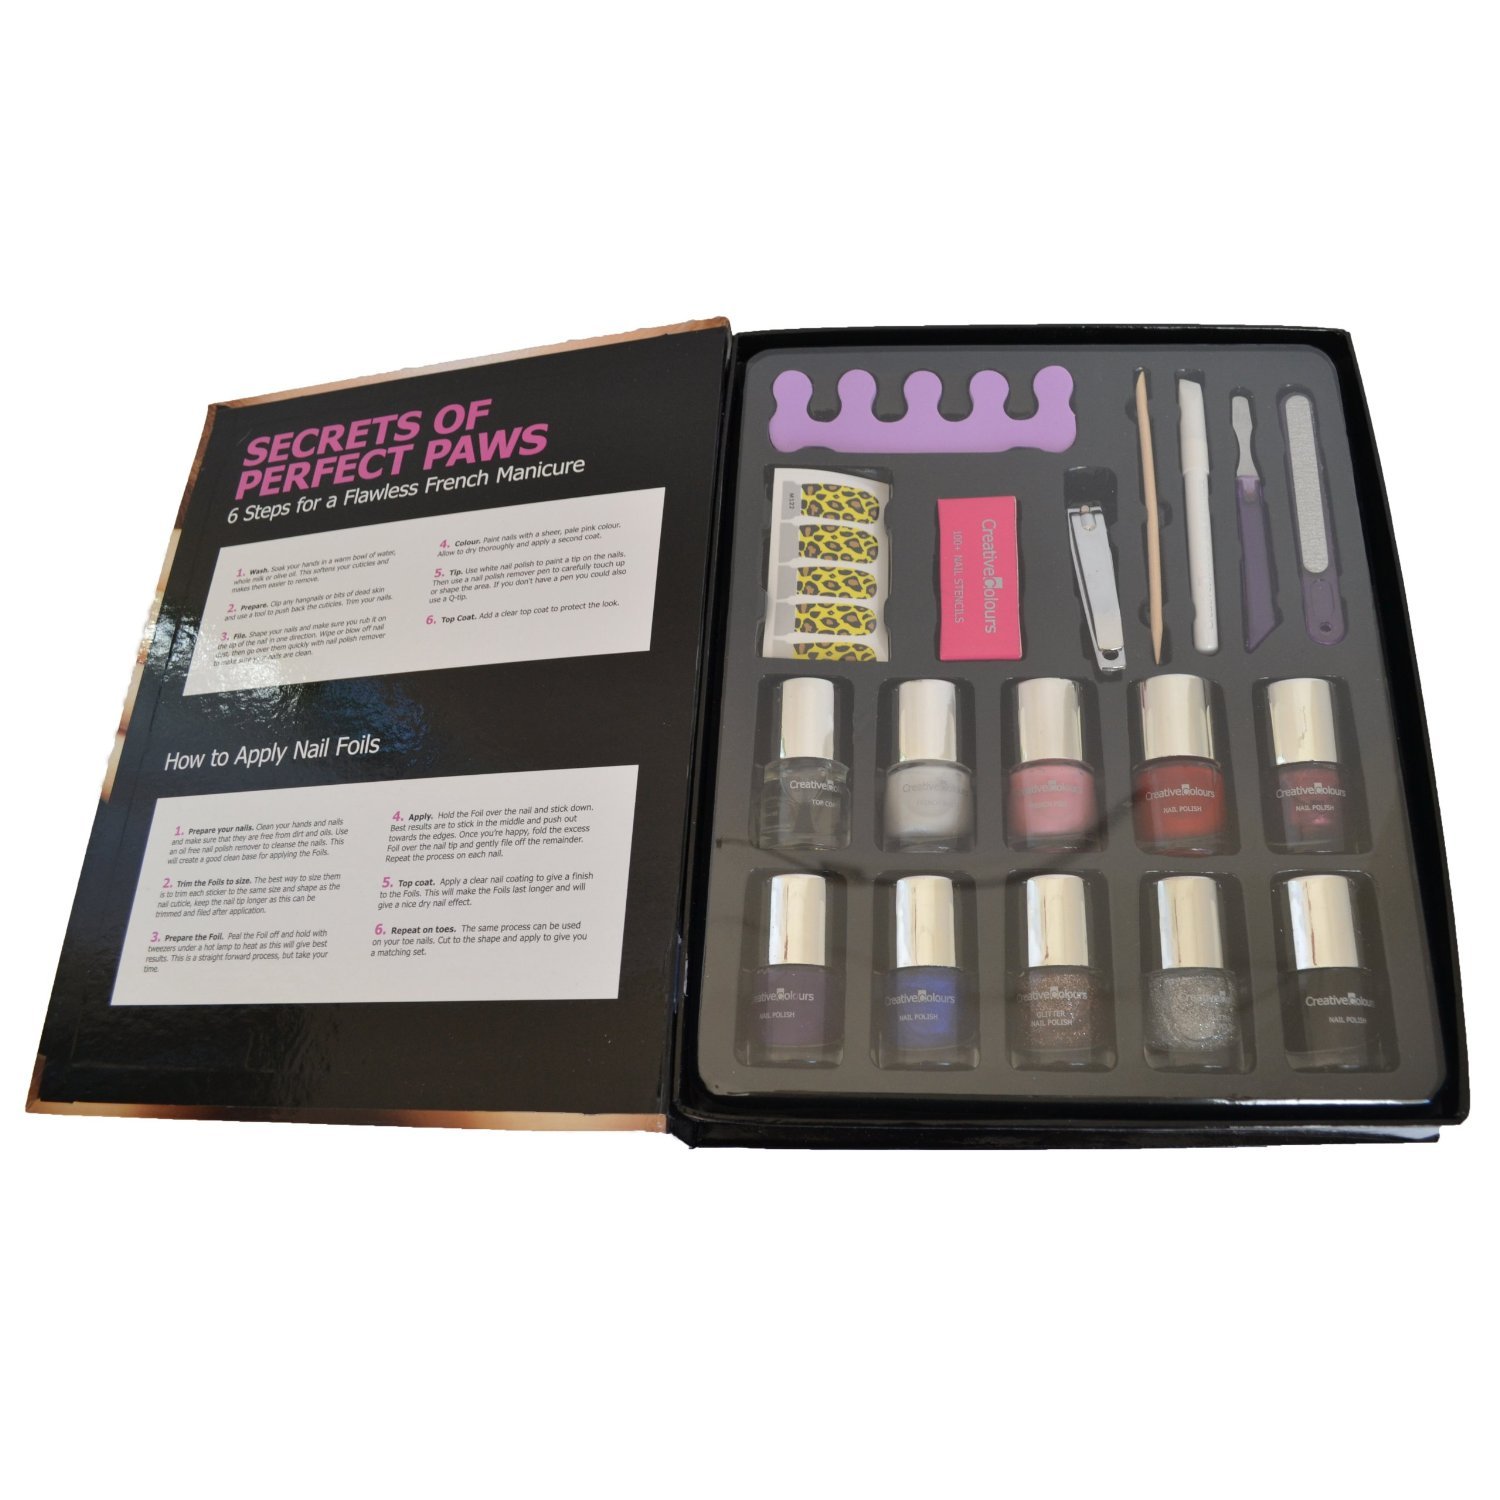
I was genuinely touched, not only did she put a lot of thought into it, but the actual nail polish colours are beautiful!

I've never heard of the brand creative colour before, and was quite intrigued to try it out.


I am impressed!  The pigment colour was fantastic and it was really easy to apply.  The picture above is metallic blue layered with black and silver glitter.  Unlike most metallic colours, the blue only needed one coat!  Admittedly if I wasn't layering with the glitter I may have done two coats as when I held my nails up to the light it was a little patchy in places.

The brush was standard, no frills, but easy to use.  My only complaints were that the glitter varnish got quite gloopy towards the end of my second hand (the bottle was open for less than 8 minutes), and the thin layers took forever to dry!  Seriously I was having to wait between 10-15 minutes until they were ready for the next coat.  However seeing as I like to take time on my nails and watch Dexter on Netflix this isn't such a huge issue.

This brand also works out cheaper than MUA when bought in bulk - you can get their 'party pack' of 8 colours for under £5 on Amazon, and the great gift pack I was given is only £10 on ebay :)

Sadly there doesn't seem to be much of a colour selection, and they don't seem to sell the colours individually.  But the selection of shades they do have seem to cover all the basics, and have some pretty awesome glitter ones too.

I am a definite fan!


Comments

  1. hi! thanks for the review! I founded this nails set on e-bay.. I would to buy this... Can I ask you a question, please? Is this set made in China? I'm not a fan of made in China product...
    thanks! ;)

    ReplyDelete
  2. Hi there Roxygen, I am afraid I don't actually know whether this has been made in china. I do however know that even if it was, it must have passed all EU laws and legislation (ingredients etc) to be sold in the UK.
    I hope this helps :)

    ReplyDelete

Post a Comment

Popular posts from this blog

Colour B4 Extra Strength Review - Part Two Using the Dye Remover and helping to prevent re-oxidation

If you haven't already read it, you should really check out Part One of this as it details preparation, it can be found here Well it is done and I am rather impressed with the results, even if I do say so myself!  There were a few things that I did differently this time and I will go through the entire process and then share the finished result. You will need; Sectioning Clips Comb Colour B4 Extra Strength Cling Film Two beanie style hats Hair Dryer Shower Bucket Loads of Patience Step One Start by sectioning your hair and clipping the upper portion to the top of your head.  If like me you have long hair, it is best to start with the underneath layers.  I found the easiest way to apply the remover was to take a small section of hair (no more than an inch wide) and squirt a small amount into my gloved hands and start with the ends carefully rub it in.  I usually applied 3 squirts to each section; end, mid length and root.  Time should be taken to ensure each squ

Superdrug Colour Rewind - Hair Dye Remover Review - Part One

I started dying my hair at the grand old age of 15 - fast forward to 12 years later and my hair has become a dried out mop of horror.  I started with black - I loved Marilyn Manson and Slipknot and needed the world to view my hair as an extension of my sheer awesomeness!  This phase lasted until I was about 19; almost 4 years of the darkest of darks layered over my hair. I alternated between black, black-blue, black-purple and even tried dip dyed black and red.  At 19 I wanted a change and decide to bleach it so I could dye it red - after an initial day of ginger (luckily I was favouring the sporty baseball cap in this period) I switched to a dark red.  Next came a few years of alternating between different shades of red and then various browns. When we started trying for a baby in 2010 I was worried that the constant dying of my hair whilst pregnant could cause development issues - I went to a professional hair dresser and had blonde highlights put through my then dark brown

Replacement Blades for the Silhouette Cameo - UK users

From the moment I purchased my Silhouette Cameo I was in love.  The only way I could justify the cost was to start up a business , the only problem with this was the cost of the blades.  I was getting through a blade every few weeks, at just under £16.00 (including postage) for a single blade it was getting very expensive.  I knew that once business picked up I was going to either have to increase prices (never a good idea for new businesses) or take a big knock in profits.  The only solution I could see was be to try and find a cheaper solution to the blades. I was first made aware of using disposable blades by Ligaya's Creativity Zone .  She had had success with an aluminium (CB09) Blade Holder.  This blog was invaluable for advice on the different angled blades available and suppliers of the CB09 Blade Holder. The only drawbacks were the seller was based in Asia (have been stung for import taxes before, and it is a hefty amount) and there were reports that the holder act